Our Make Play workshops offer a sensory, creative space for children aged 6 months to 5 years to enjoy with their parent/carer. For those who can’t make it to our in-person sessions we have we have digitised our most popular Make Play sessions, so you can now enjoy them in the comfort of your own home.
DIY Portable Projector
Create your own mini projector using simple materials from around the house. Great for storytelling, shadow play or just a bit of crafty fun!
Inspired by our Make Play sessions, a sensory creative space for children, this activity brings light, shadow and storytelling to life right in your living room.
Materials Needed:
* 1 Cardboard Tube (empty toilet paper roll would work perfectly!)
* Foam
* Sticky back plastic or cling film
* Tape
* Scissors
* Pencil
* Torch
Instructions:
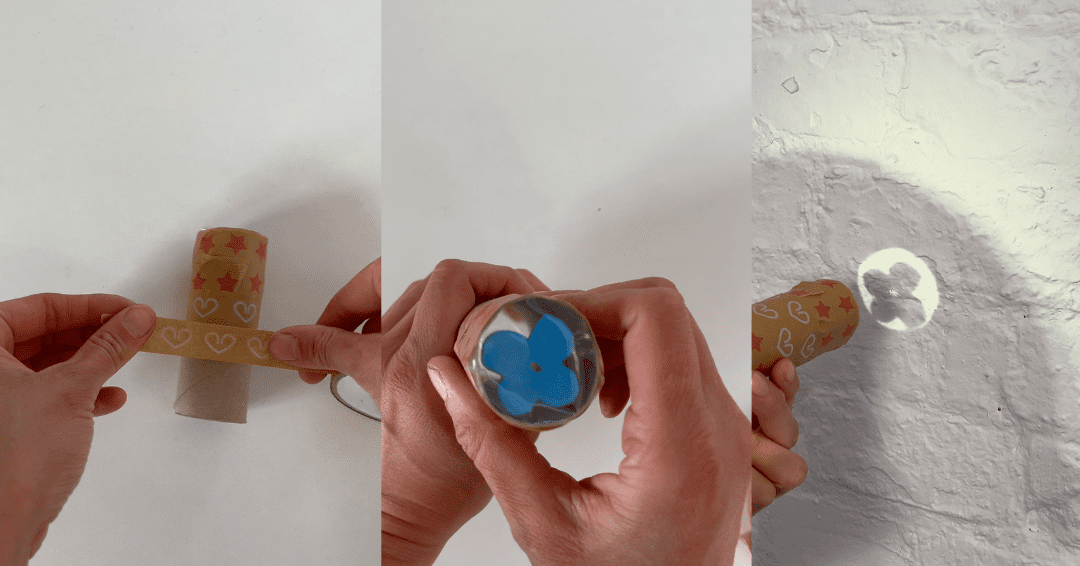
1. Prepare the cardboard tube
*Make sure it’s clean and dry.
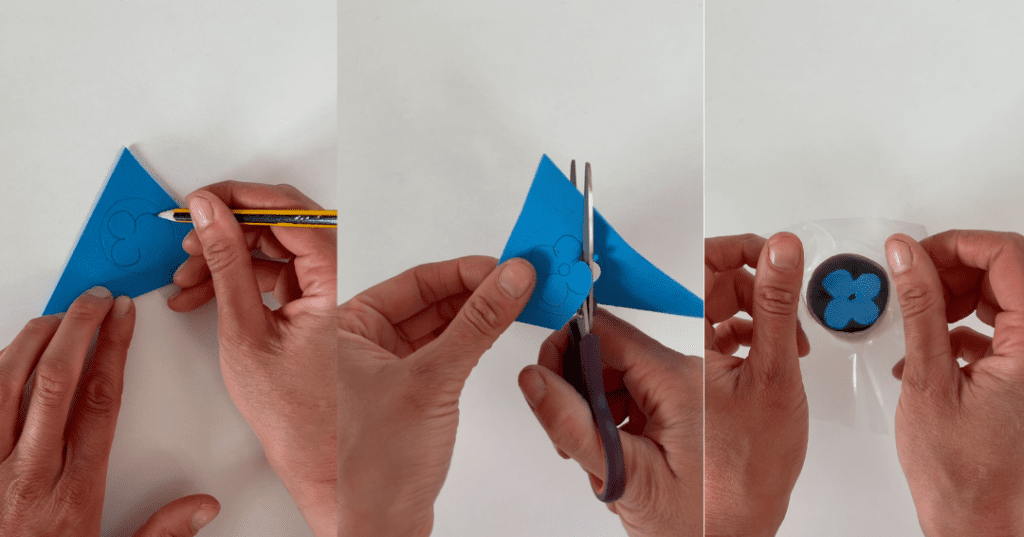
2. Create Your Image
* Place the toilet roll on the foam card and trace around the circular opening.
* Draw your design inside the circle (keep it simple for best results!).
* Cut out your shape – it will be the image you project.
3. Attach the Image
* Cut a piece of sticky back plastic slightly larger than the end of the tube.
* Peel off the backing to expose the sticky side.
* Stick your foam image onto the sticky side.
4. Assemble the Projector
* Place the toilet roll over the contact paper so the image is in the middle of the tube.
* Secure around the end of the tube using tape.
5. Decorate (Optional)
*Use pens, stickers, or washi tape to decorate the outside of your projector.
6. Play around!
* Shine a torch through the open end of the roll.
* Point it at a wall or ceiling in a dark room.
* Adjust the distance to sharpen the image.
